3d box dimensions drawing with gimp
I've been cartoon maps for D&D since first playing the game in '78. Playing online requires digital maps, and then I taught myself using GIMP.
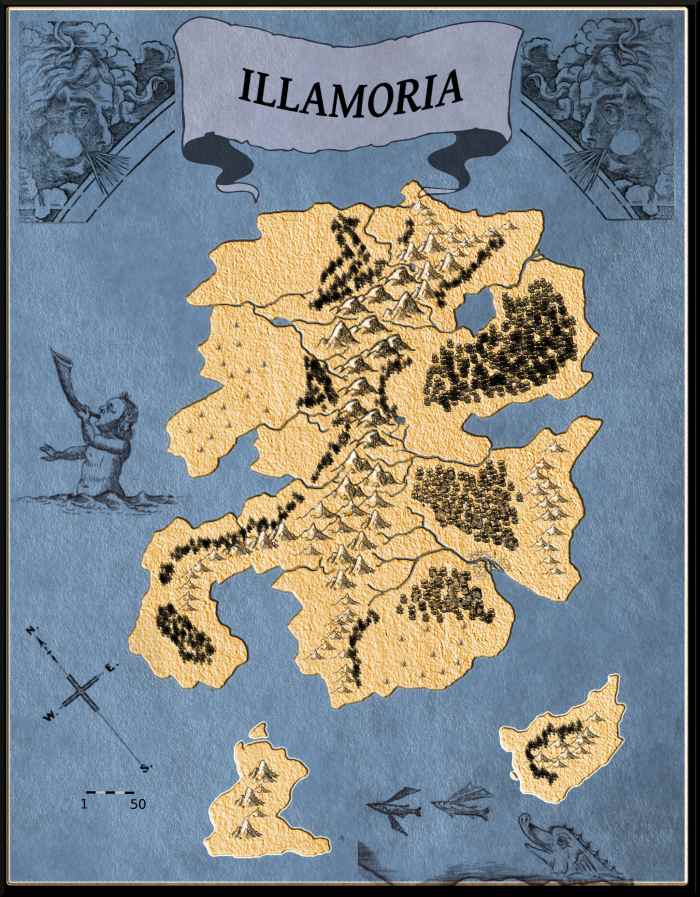
Finished Example Map

Final Map
Created by Frost Birch Maps
Creating Fantasy Maps for D&D
Though D&D is a theatre of the mind game, having a good map is handy and sometimes essential. Every entrada needs a world map so that is the logical commencement step. Earth maps are easier to create than city maps or dungeons, the detail is less and the scale is much larger. Less particular means it is easier and faster to create. So if you need a map quick and y'all don't really care nearly the details, then start with a world map.
I've written other tutorials on doing the details. Bank check them out equally needed.
Choosing the Right Software
Choosing the right software is office of the battle. I didn't take the money to buy a commercial photo editing software parcel and so I chose the next pick. I downloaded Gimp 2.8; (Now version ii.10.12) complimentary software that does nigh of the same things that the loftier-finish commercial software does, so it was an easy choice.
In that location are other tools & programs that you can use to create maps but they don't have layers and then it makes editing maps hard. What you can do is use some of these tools equally a starting betoken. Import them into Gimp and extract the parts y'all need.
For now, download and install Gimp and we'll get-go creating fantasy maps.
Screen Shot of Quick Create Map
Screen Shot
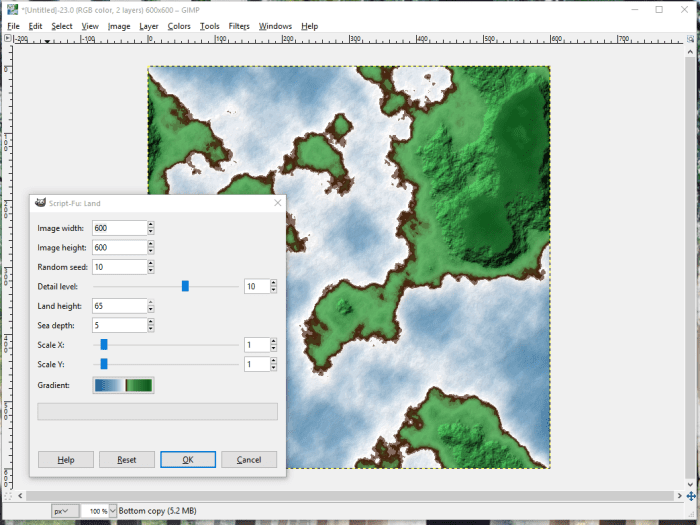
Creating a Quick Map Cosmos.
Let the software do all the piece of work for you. Gimp has a fast create push button for making a world map or at to the lowest degree a portion of a world map.
You may have to do a few attempts only it is a good first step. it creates land with contours and h2o with color and shading. All that is left is for yous to add a text layer and placement of cities and roads etc.
Follow these steps:
- Start Gimp.
- F ile-Crea t east- P atterns- L and
- Set the parameters to whats in the screen shot
- add text (in a separate layer of grade)
- add together icons for cities, towns, and villages
- draw roads
Enjoy the map.
The problem I see with the car create feature is some anomalies similar the flat top mountains. Play with the parameters a chip and attempt different seeds for different maps.
Quick Gear up.
You can always edit the area with a cloud cover and make that surface area a MYSTERY ZONE. Then create a close upwardly map for that expanse.
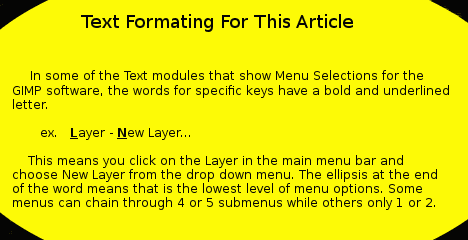
Text Formating Warning
One of My First World Maps
One of my get-go map attempts
Created past Frost Birch Maps
Separating map creation into layers allows editing the map and so much easier.. Gimp allows this and then you can create a layer for land and a separate layer for water and another for text. Separating these features on split up layer permit to you work with each separately and making a error on one layer doesn't touch the others.
Having a map separated into layers also allows yous to show parts of the map separately. Then y'all can make a urban center map with no text for you players to explore and another map with the key for the GM. Same with your world map, you can print i with limited info for the players to explore and one with the political boundaries and another with merchandise routes because having everything on 1 map would have to be huge to contain all that info without being a jumbled mess.
Understanding how to use layers will allow you lot to piece of work you map more effectively while you are drawing information technology out. Programme ahead and decide what you need alee of time.
For me I ordinarily have iii layer groups.
- Land
- Water
- Text
Within those layers I have different layers as well. And so in the Land Group I separate vegetation, concrete landmarks, buildings and roads. In the text group I may have concrete names like roads and river names on a separate layer from political boundaries etc.
You only need to remember of how many dissimilar maps yous want to print out and what info you want to be bachelor.
The Rock Circle
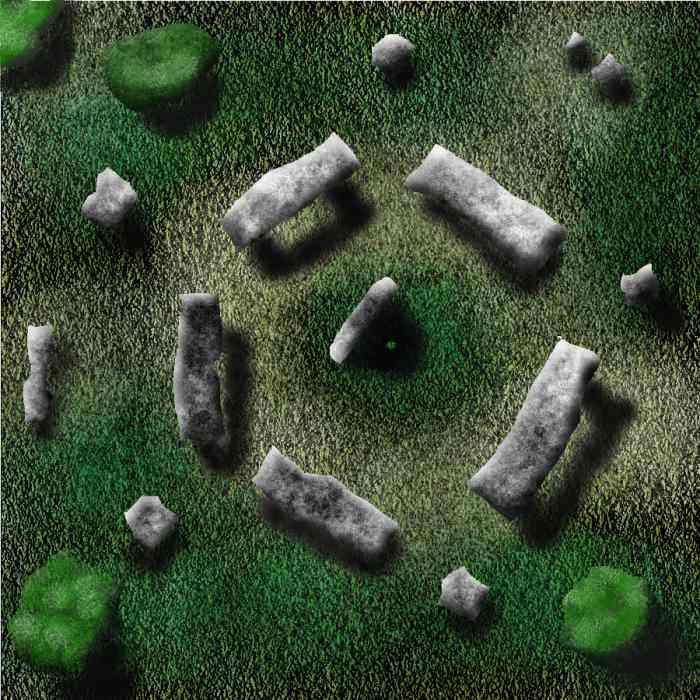
The Stone Circle
Created by Frost Birch Maps
Brand What Yous Need
I made the Rock Circle very quickly. I constitute an epitome on the net for what I needed in my entrada. This way I had something to model my map afterward. I took the idea with the placements of parts etc and made my new pattern in GIMP from that. The Stone Circumvolve took my nigh an hour to create all told.
My advice is don't start with a blank sheet; have an thought before manus of what y'all want to create. A simple sketch or outline is a start. Then write down a list of carve up parts you want to work with. These will become your layers.
Information technology is best to work these layer lists out earlier paw. You lot can always bring together layers but you tin can't divide them.
Suggested Map Layers Breakup
| Groups | Layers |
|---|---|
| Land | montains, hills, natural features |
| Water | seas,lakes,rivers,swamps |
| Texture | textures, buildings, roads, vegatation, places of interest |
| Text | physical feature names, building keys, scale and fable, political boundaries, climate zones |
Map Quiz.
Created past Frost Birch Maps
Step 01 Map Making
To get to this point I choose F ile N ew and choose prototype size of 900x900 pixels and choose 600 ppi in the advanced section for 10 and Y resolution. Put a title in the template option at the top of the page creation box and it will relieve your choices equally a template.
Make the background white.
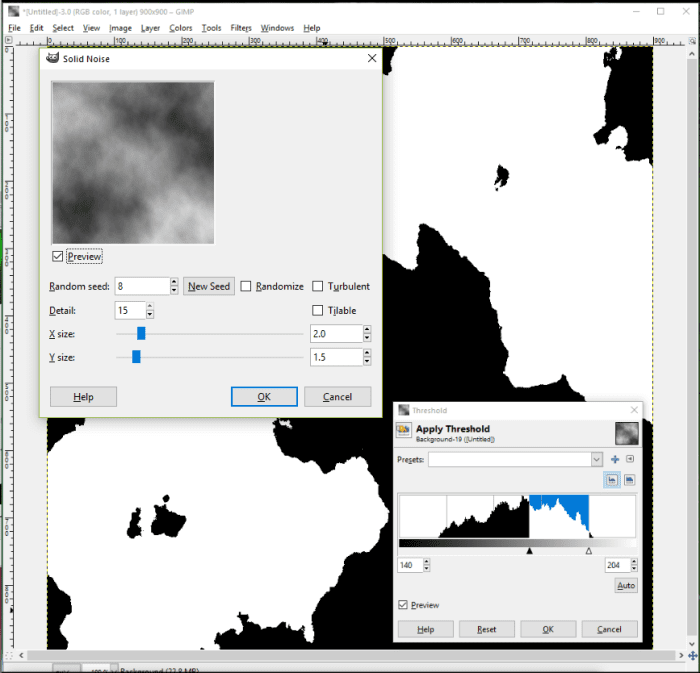
At present we brand the magic. Cull Filte r s R ender C louds D ifference Clouds... ( Filters Render Due northoise Difference_Clouds. .. )
This volition open a new Solid Noise (Difference_Clouds) creation box. Make full in the numbers to friction match that in the picture and you will create a map to follow forth with. Afterwards, you lot can create a new map by adjusting the numbers and come across what happens.
Now click on C olors T hreshold... and fill in the numbers equally in the film Apply Threshold creation box. And then you will have a map base of operations with which to start.
Pace 02 Creating Layers
Created past Frost Birch Maps
Step 02 Creating Layers
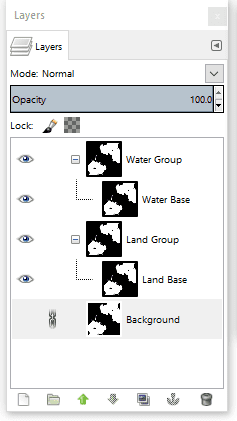
Now you have a Background layer. Click on that layer in the layers dialog box. If you lot do not accept that open click on Westward indows - D ockable Dialogs - L ayers... . In this dialog box yous select the layer y'all wish to work on.
Click on L ayer - D u plicate Layer twice so you should terminate with 3 layers. Double click on 1 and rename it Water Base. Double click on the other and rename it Land Base.
At present create a Layer Group for each. Layer New Layer Group... Lable on H2o Group and Lable some other Land Group. At present in the Layer dialog box elevate the Water Base layer into the H2o Group and the Country Base of operations layer into the land group.
Click off the middle for Groundwork and salve this layer equally a starting signal if something happens that yous need to get back. Never work on this layer, always brand a copy and work on the re-create.
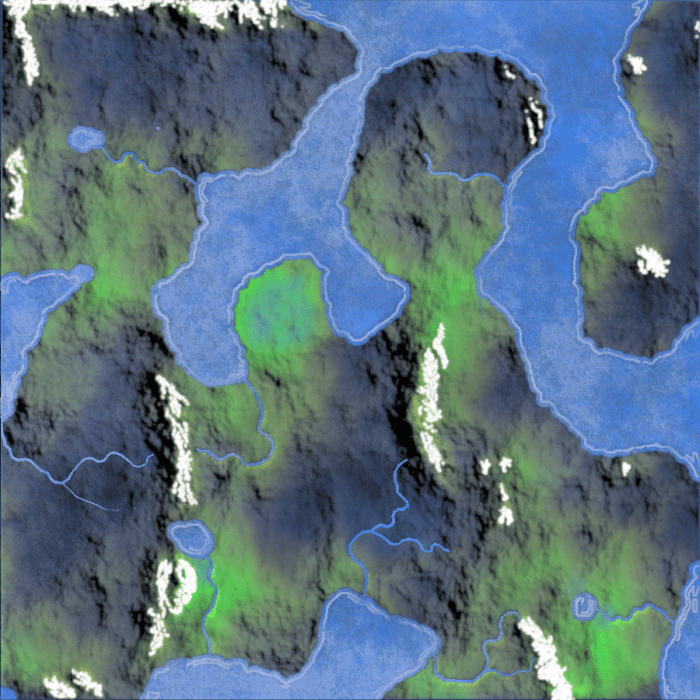
Step 03 Water Texture
Created by Frost Birch Maps
Step 03 H2o Texture
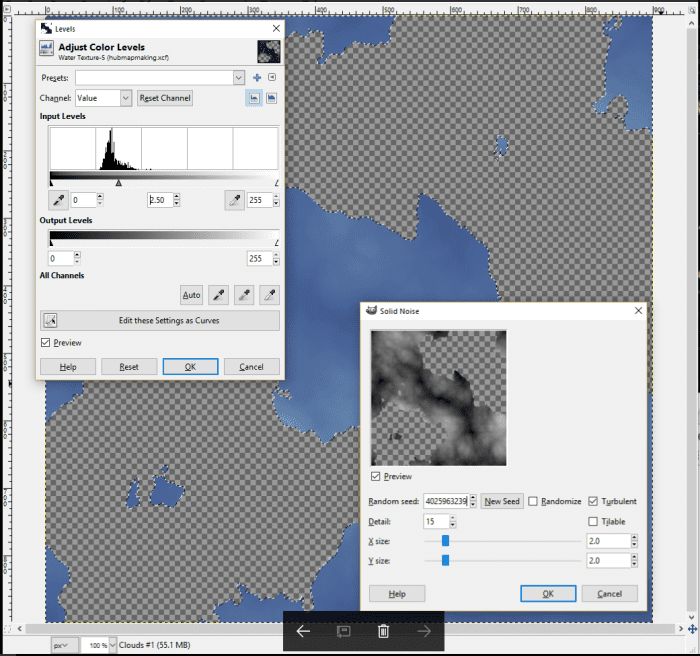
Calculation texture to water is as piece of cake as Filter s R ender C louds Difference Clouds... ( Filters Render Northoise Difference_Clouds...)
This time we use the Turbulent option. To this, we open up the Gradient dialog and choose The Deep Sea gradient preset. Click on the Gradient Tool (next to the paint bucket). Click on the grey box showing the gradient presets and become downward the lists to Deep Body of water.
Now making sure your correct layer is selected you can go C olors Thousand ap G radient Map. At present depending on your difference clouds settings this may exist a chip night. If and so go C olors 50 evels and adjust the settings to lighten the color levels to what suits yous.
Step 04 Country Textures
Created by Frost Birch Maps
Step 04 Land Texture
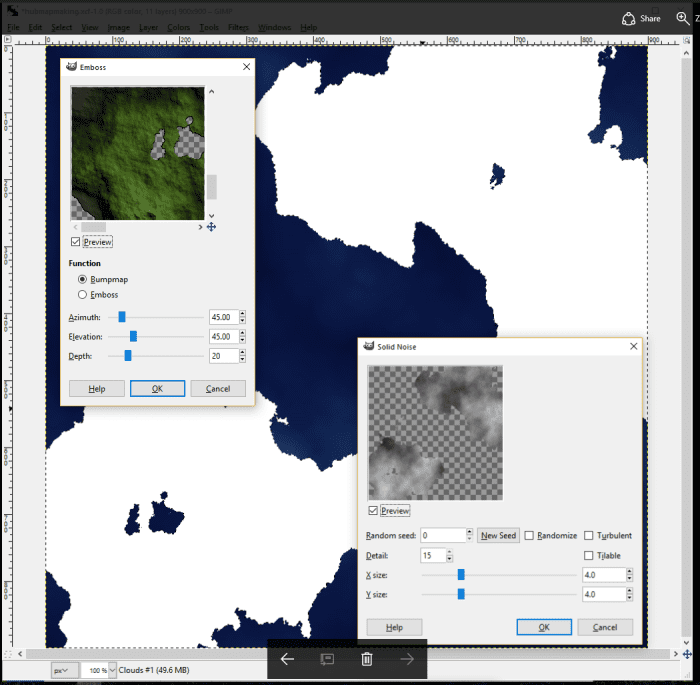
Much the same for state as water. Choose Difference Clouds and add a slope color ( Greens Preset) and then make it a Bumpmap. F ilters D istorts E mboss... Click the Bumpmap radio button and settings as per picture. You may want to adjust the levels to your taste. I adjusted the lower levels up to 23 merely to lighten the scene a chip.
Now that you take a contour to the land you can draw in rivers. Utilize a fine castor and a blue color draw on a new transparent layer so you can see the state through. It is piece of cake to erase mistakes when you are drawing on a separate layer.
Step 05 Text Layer
Created by Frost Birch Maps
Step 05 Text Layer
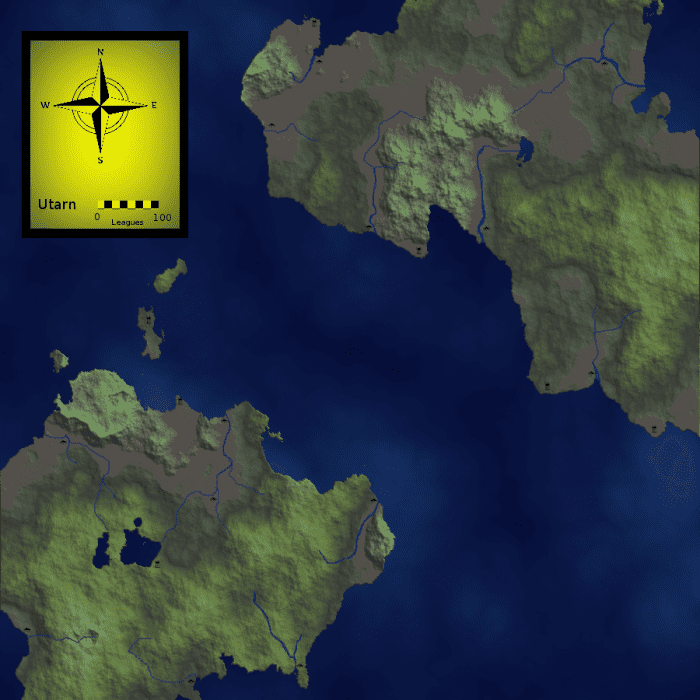
I added a legend. And stamped some towns and outposts and I call this map done.
You could add roads and merchandise routes. Political boundries also is some other pick.
Using GIMP 2.10.12
Created past Frost Birch Maps
Would You Like a More In-Depth Tutorial on Map Making?
Abu Huraira on July eleven, 2019:
Intresting,
I'm not good with tech and computers but would like to learn game design.
Kevin on May 17, 2018:
Besides, how is there an alpha channel in the background in the film for step iii?
Kevin on May 17, 2018:
I like this tutorial, only the instructions are very unclear starting with section 3. For example, how practice y'all 'add together a colour slope' to difference clouds?
Source: https://discover.hubpages.com/art/Creating-Fantasy-Maps-for-DD
0 Response to "3d box dimensions drawing with gimp"
Post a Comment